
Packing the kitchen is, for many people, the most challenging stage of a move. Kitchens contain fragile and heavy items, liquids, appliances, and oddly shaped objects that can easily break if they are not packed properly. That’s why it’s important to know how to pack a kitchen for moving, whether you’re relocating from an apartment or a house.
In this guide, you’ll go through the process step by step, starting with proper kitchen preparation and continuing with the best methods for packing dishes, pots and pans, glassware, utensils, and appliances.
How to Prepare Your Kitchen Before Packing
Before you seal your first box, properly preparing the kitchen can save you time, effort, and money. This step is often overlooked, but it makes the difference between a chaotic move and a well-organized one.
Start with Decluttering
Begin by checking all cabinets, drawers, and shelves. The kitchen is one of the areas where unused items, duplicates, or things kept “just in case” tend to accumulate.
The process of decluttering before moving helps significantly reduce the number of items you need to pack and transport, making the move faster, more efficient, and easier to manage.
Remove:
- chipped or cracked dishes
- containers without lids
- appliances you no longer use
- expired spices and food
If an item hasn’t been used in over a year, there’s a good chance it isn’t worth moving. Donate anything that’s still in good condition and discard the rest. The more you eliminate in advance, the fewer boxes you’ll need, the less time you’ll spend packing, and the lower your overall moving costs will be.
Decide What You’ll Use Until Moving Day
Don’t pack everything at once. Think about what you’ll need on a daily basis up until the last day.
Set aside:
- one plate, one bowl, one cup, and a set of utensils per person
- one pan or pot for simple cooking
- a coffee maker, kettle, or stovetop coffee pot if you use them daily
These items will later go into a separate essentials box that’s easy to access after the move.
Reduce Pantry and Refrigerator Contents
A few days before moving:
- stop unnecessary grocery shopping
- use up food from the refrigerator and freezer
- discard perishable items and opened liquids
Most moving companies do not transport perishable food or improperly sealed liquids, as they can leak or create unpleasant odors during the move.
Clean Items Before Packing
A light cleaning before packing protects both your belongings and the boxes.
It’s enough to:
- wipe grease off dishes and pans
- fully dry appliances
- remove crumbs from drawers
Packing clean items helps prevent stains, odors, and other issues during transport or storage.
Packing Dishes for Moving
Dishes are among the most fragile—and most commonly broken—items during a move. Plates, bowls, and cups require a different packing method than other kitchen items, as their combined weight and flat shape increase the risk of cracks and chipping.
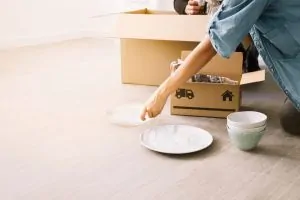
How to Properly Pack Plates and Bowls
The safest method is individual wrapping, followed by vertical placement inside the box.
Correct process:
- wrap each plate individually in packing paper
- avoid stacking plates directly without protection between them
- place plates vertically, side by side, not flat
- fill empty spaces with paper to prevent movement
Vertical placement reduces lateral pressure and lowers the risk of cracking.
How to Pack Cups and Mugs
Cups and mugs should be handled separately from plates:
- fill the interior with paper to prevent collapse
- wrap handles with an extra layer of protection
- place them on their side or upside down, never stacked without separation
Important Box Rules
- use small or medium boxes, not large ones
- do not combine dishes with heavy items such as pots or canned goods
- clearly label boxes as “Fragile” and “This Side Up”
A box that is too heavy is more dangerous than one that is slightly underfilled. Excessive weight leads to compression and cracking, even when individual items are well protected.
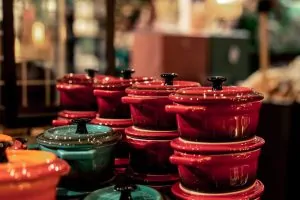
How Do You Pack Pots and Pans for Moving
Pots and pans are not fragile in the traditional sense, but they can easily damage other items if they are packed incorrectly. In addition, glass lids require a completely different approach compared to metal cookware.
Packing Large Pots and Pans
For the main cookware pieces:
- clean and fully dry each item
- place smaller pots inside larger ones only if the sizes allow proper nesting
- add packing paper or soft fabric between items to prevent scratches
Frying pans can also be nested, with protective layers between surfaces, especially if they have nonstick coatings.
How to Handle Lids
Lids are the most vulnerable items:
- glass lids should be packed separately and individually
- wrap them completely and place them vertically, similar to plates
- metal lids can be packed next to pots, but always with separation
Do not attach lids directly to pots without protection, as vibrations during transport can cause cracks or breakage.
How to Place Pots and Pans in Boxes
- use medium-sized boxes rather than large ones
- place heavier items at the bottom of the box
- fill empty spaces to prevent shifting during transport
If there is remaining space, do not add fragile items. It is safer to use packing paper or textiles than to risk damaging other belongings.
Packing Glasses for Moving
Glasses are among the most fragile items in the kitchen and require special care during a move. Whether you’re packing water glasses, wine glasses, or delicate stemware, breakage most often occurs due to internal pressure inside the box and uncontrolled movement during transport—not necessarily from strong impacts.
To prevent damage, it is essential to pack each glass individually and secure it firmly inside the box.
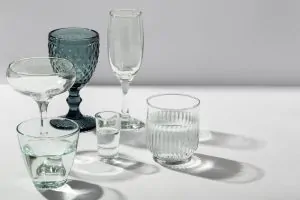
How to Pack Regular Glasses (Water, Juice, Beer Glasses)
For glasses without stems:
- fill the inside of each glass with packing paper
- wrap the glass completely, including the base
- place glasses vertically, not on their side
- do not nest glasses inside one another
Vertical placement reduces lateral pressure and lowers the risk of cracking.
How to Pack Wine Glasses and Stemware
Stemmed glasses are the most vulnerable items in the kitchen.
Correct method:
- protect the stem separately with an extra layer of paper
- wrap the bowl and stem together as a single unit
- place glasses vertically with space between them
- use cardboard dividers if available
Packing stemware without separation is not recommended, even if the glasses are well wrapped.
Securing Glasses Inside the Box
For maximum protection:
- use small or medium boxes
- create a thick protective layer at the bottom of the box
- fully fill all empty spaces between glasses
- add cushioning material on top as well
If you feel any movement when lifting the box, add more paper or cardboard until the glasses are completely secure.
Proper Labeling
All boxes containing glasses should be clearly marked with:
- Fragile
- Glassware
- arrows indicating the correct orientation such as This Side Up
Proper labeling helps ensure careful handling and reduces the risk of boxes being stacked under heavier items.
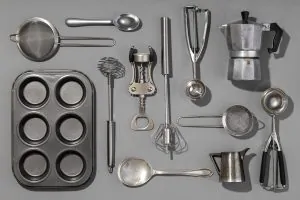
How to Pack Small Kitchen Items for Moving
Small kitchen items are often underestimated, but they can cause clutter, loss, or damage if they are not organized properly. Cutlery, utensils, accessories, and oddly shaped items are not fragile on their own, but they can damage other belongings or scatter easily during transport.
Cutlery (Forks, Knives, Spoons)
For cutlery:
- group items into small sets
- wrap each set in packing paper or plastic wrap
- secure them with tape or rubber bands
Knives should be handled separately:
- protect blades with cardboard or thick paper
- never leave knives loose inside a box
- label the bundle as Sharp
This method helps prevent both injuries and damage to other items.
Kitchen Utensils (Spatulas, Whisks, Ladles)
Long utensils can be packed together:
- align them lengthwise
- wrap them in a layer of paper
- place them in a long box or a standard box, securely positioned
Avoid placing them loose on top of dishes or glassware.
Accessories and Oddly Shaped Items
This category includes:
- kitchen scales
- grinders
- garlic presses
- baking pans and molds
- small appliance accessories
Recommendations:
- group items by category
- use resealable bags for small parts
- label bags before placing them into boxes
How to Organize Boxes Properly
- do not mix small items with fragile items
- fill empty spaces to prevent movement
- avoid very large boxes
A well-organized box is quicker to unpack and reduces the risk of losing important small pieces.
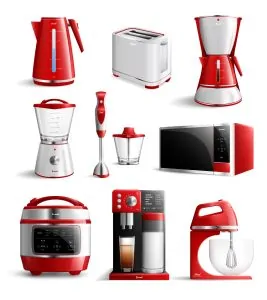
How to Pack Kitchen Appliances
Small kitchen appliances are more sensitive than they may seem at first glance. While they are not as fragile as glassware, they can be easily damaged by moisture, internal shocks, loosely secured cords, or movable parts. Proper packing reduces the risk of malfunction and helps prevent unpleasant odors or mold after the move.
Preparing Appliances Before Packing
Before placing appliances into boxes:
- unplug appliances at least 24 hours in advance
- clean and fully dry each appliance
- remove crumbs, grease, and residue
Appliances packed while damp can develop mold during transport or storage.
How to Pack Small Kitchen Appliances
For items such as blenders, toasters, coffee makers, air fryers, or mixers:
- use the original packaging if available
- otherwise choose a box that closely fits the appliance
- wrap the appliance in packing paper or soft fabric
- secure it inside the box so it cannot shift
Avoid using boxes that are much larger than the appliance, as excess space increases the risk of impact damage.
Managing Cords and Detachable Parts
An often overlooked step is organizing accessories:
- coil cords neatly and secure them with tape or rubber bands
- place detachable parts such as cups, blades, or attachments in separate bags
- label the bags and place them in the same box as the appliance
This helps prevent lost parts and reduces reassembly time after the move.
Where NOT to Pack Kitchen Appliances
- do not place them in boxes with heavy items
- do not pack them together with liquids or food
- do not position them at the bottom of stacked boxes
Kitchen appliances should be transported in sturdy boxes, protected from excessive pressure.
How Many Boxes Do You Need to Pack a Kitchen?
The number of boxes needed to pack a kitchen varies significantly depending on the size of the home, cooking habits, and the amount of items accumulated over time. Kitchens are generally the rooms that require the highest number of boxes relative to their size.
Small Apartment (Studio or One-Bedroom)
For a small apartment kitchen:
- approximately 10–15 boxes
- limited dish collections
- few small appliances
This estimate applies if you have done proper decluttering before packing.
Medium or Large Apartment
For apartments with larger kitchens:
- approximately 15–25 boxes
- multiple dish sets
- several small appliances
The volume increases quickly if there are many decorative items or rarely used accessories.
House or Family Kitchen
For a house or heavily used family kitchen:
- between 25–40 boxes
- multiple dish sets
- pots, pans, and various appliances
In these cases, it is recommended to use boxes of different sizes and avoid overloading large boxes.
Factors That Influence the Number of Boxes
- how many people use the kitchen
- how often you cook
- the number of appliances
- how thorough your decluttering process was
Regardless of kitchen size, it is important to use proper boxes and packing materials rather than improvised solutions. Boxes that are too large can collapse under weight, while boxes that are too thin do not adequately protect fragile items. Choosing the right moving supplies makes the difference between a safe move and one where unnecessary damage can occur—especially when packing dishes, glassware, and kitchen appliances.
Frequently Asked Questions About Packing a Kitchen for Moving
What is the best way to pack dishes for a move?
Dishes should be packed individually using packing paper or plain paper, not newspapers. Plates should be placed vertically inside the box, similar to vinyl records, to reduce pressure. The bottom of the box should be reinforced, and all empty spaces should be fully filled so items do not shift during transport.
What is the best way to pack wine glasses?
Wine glasses require extra protection, especially around the stem. Each glass should be wrapped individually, with special attention to the base. If you have access to specialty glassware boxes or divided boxes, these are the safest option and significantly reduce the risk of breakage. Glasses should be placed vertically, without direct stacking.
What is the best way to pack kitchen appliances?
Kitchen appliances should be cleaned and fully dried before packing. Cords should be coiled and secured separately, and detachable parts should be packed individually. Appliances should be placed in boxes that closely match their size and be well cushioned to prevent movement and shocks during transport.
How many boxes are typically needed for a kitchen?
An apartment kitchen usually requires between 15 and 25 boxes, while a house kitchen can require 30 to 40 boxes, depending on volume and the number of items. Proper decluttering before packing can significantly reduce both the number of boxes needed and overall moving time.
Can I pack the kitchen one day before moving?
Yes, most of the kitchen can be packed in advance. It is recommended to keep a small set of essential items separate for the last day, such as a few plates, glasses, utensils, one pan, and basic cleaning supplies, so you don’t need to reopen packed boxes.
Is it safer to pack the kitchen myself or hire a moving company?
For large kitchens, fragile items, or long-distance moves, hiring a professional team is often the safer and more efficient option. An experienced company such as Moishe’s Moving has the proper materials, packing techniques, and trained staff to handle delicate items, reducing the risk of damage and saving time.
Packing the kitchen is one of the most demanding stages of a move, especially when you’ve accumulated a large number of items over time. Taking an organized, step-by-step approach helps reduce risks, wasted time, and unnecessary stress. Before you begin packing, it’s a good idea to carefully sort through your belongings and decide what is truly worth taking with you. If you have too many dishes, appliances, or items you no longer use, donating them before the move is a practical solution—it reduces the volume being transported and allows you to start fresh in your new home.
And if the move becomes too complex or the volume of items exceeds what you can comfortably manage on your own, turning to a professional moving team can make the difference between a chaotic experience and a well-organized one. With proper planning and smart decisions made ahead of time, your kitchen can arrive safely at your new home—without unpleasant surprises.
Get a Free Moving Quote Today